Astro is one of my new favorite tools for building anything from blogs to full-fledged web apps. I’m particularly drawn to features like file-based routing, the island architecture, and the option to choose between static generation and server-side routing. In this tutorial, I’ll help you get set up with a basic blog.
Getting started
To get started, run the setup wizard! 🧙
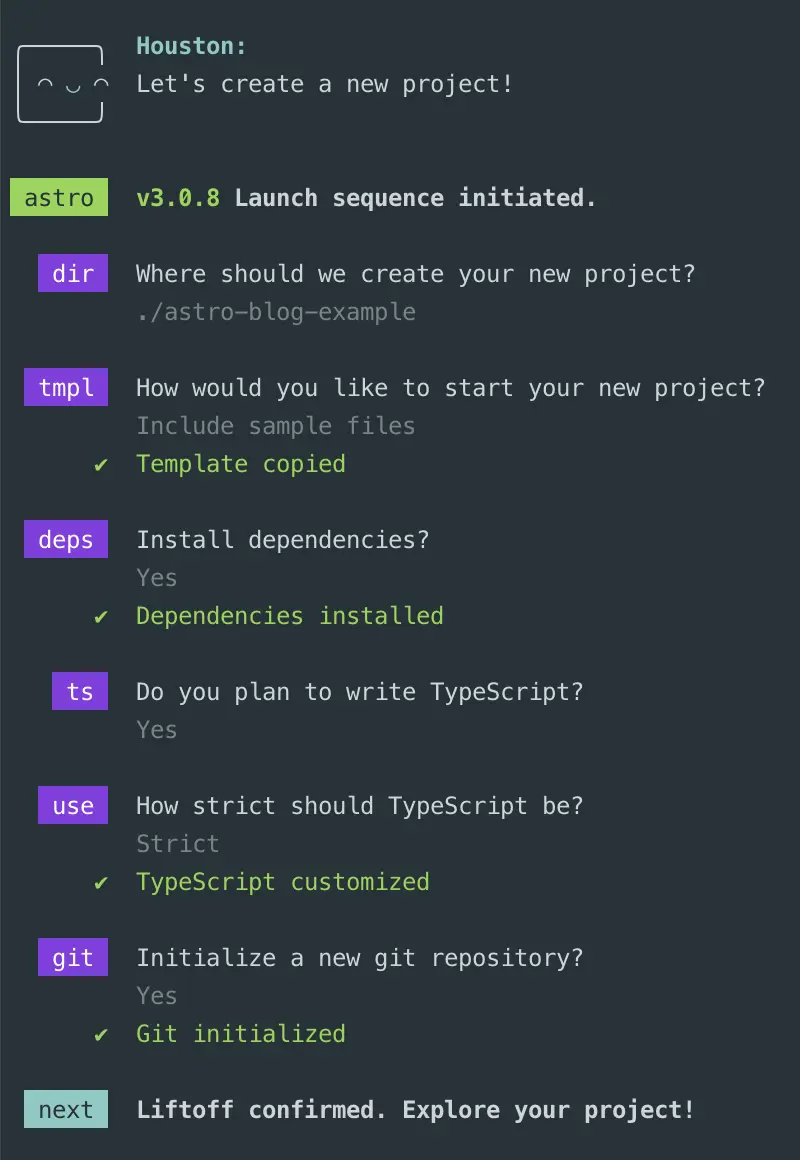
npm create astro@latestThe wizard does a nice job of guiding you through the setup process. You can even skip reading the rest of this post and choose Use blog template in the wizard to use Astro’s default blog template. For this post, I instead chose the option Include sample files.
Below you can see all the options I chose:

To ensure the wizard worked properly, cd into your project and run:
npm startYou should be up and running now!
Updating the home page
As of astro@3.0.8, the create command generates the following files under src:
src/components/Card.astroenv.d.tssrc/layouts/Layout.astrosrc/pages/index.astroAssuming that you have the same files in your src directory*, add some default styling to the layout:
<style is:global> ... /* add this to the bottom of the style block */ main { margin: auto; padding: 1rem; width: 800px; max-width: calc(100% - 2rem); color: white; font-size: 20px; line-height: 1.6; } h1 { font-size: 4rem; font-weight: 700; line-height: 1; text-align: center; margin-bottom: 1em; } .link-card-grid { display: grid; grid-template-columns: repeat(auto-fit, minmax(24ch, 1fr)); gap: 2rem; padding: 0; }</style>From there, update the index page to the following:
---import Layout from '../layouts/Layout.astro';import Card from '../components/Card.astro';---
<Layout title="Hello">  <main>    <h1>Hello</h1>    <ul role="list" class="link-card-grid">      <Card        href="/blog/1"        title="Posts"        body="Read the latest from the blog."      />    </ul>  </main></Layout>
Now view the site in your browser, and you should see a simple blog homepage. Next, let’s make that link on the homepage work!
Adding posts
Your simple homepage introduced a link to a blog index, which doesn’t exist yet, so let’s add the blog index and post pages to make the link work.
First, create these directories:
# Creates nested directoriesmkdir -p src/content/blogmkdir -p src/pages/blogmkdir -p src/pages/postsAfter that, create these files:
# Creates src/pages/blog/[page].astro filetouch src/pages/blog/\[page\].astro# Creates src/pages/posts/[slug].astro filetouch src/pages/posts/\[slug\].astro# Creates md content filetouch src/content/blog/my-first-post.mdFrom there:
- Create a simple post…
---title: My First Post!blurb: This is my very first post.---
This is my very first post. Thanks for reading!- Update
src/pages/posts/[slug].astroto show the post…
---import Layout from '../../layouts/Layout.astro';import { getCollection } from "astro:content";
export async function getStaticPaths({ paginate }) {  const blog = await getCollection("blog");  return blog.map((post) => ({ params: { slug: post.slug }, props: { post } }));}
const { post } = Astro.props;const { Content } = await post.render();---
<Layout title={post.data.title}>  <main>    <h1>{post.data.title}</h1>
<div id="content"> <Content /> </div></Layout>- Update
src/pages/blog/[page].astroto list paginated posts…
---import Card from '../../components/Card.astro';import Layout from '../../layouts/Layout.astro';import { getCollection } from "astro:content";
export async function getStaticPaths({ paginate }) {  const blog = await getCollection("blog");  return paginate(blog, { pageSize: 10 });}
const { page } = Astro.props;---
<Layout title="Posts page {page.currentPage}">  <main>    <h1>Posts</h1>    <ul role="list" class="link-card-grid">      {page.data.map((post) => (        <Card          href={`/posts/${post.slug}`}          title={post.data.title}          body={post.data.blurb} />      ))}    </ul></Layout>
What just happened!?
We went over that rather quickly, so let’s recap:
- We created content for a post.
- We created a way to view a post.
- We created a way to view all posts.
The real magic ✨ here happened with the introduction of the getStaticPaths and getCollection functions. getStaticPaths allows us to use dynamic routes so that we can display any post with our [slug].astro page, or paginate posts with our [page].astro page. getCollection allows us to easily grab and transform our blog content for consumption. Using these 2 functions together is a real win-win! 🎉
Wrapping up
Obviously, this is a pretty simple example, and you would want to add more styles and pagination links and navigation, etc. etc. BUT hopefully you were able to experience some of the benefits of Astro and learn a little along the way.
* If you are using a different version of Astro, or if anything doesn’t make sense, you can view the full example code here.